Install Nepali Unicode in Windows
You can get the full documentation and step by step guides on the above matter in the site http://madanpuraskar.org. See the page there for more and other interesting information and utilities. The installation process described here is for only Windows XP
System requirements:
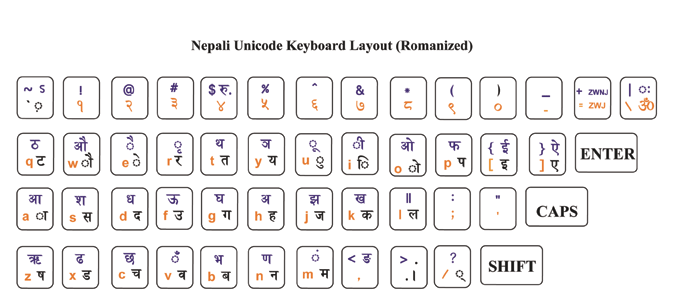
Choose romanized if you are new to nepali typing romanized layout screenshot. It types k for क, b for ब. nepal for नेपाल, yoges for योगेस. It will be fun, try it.
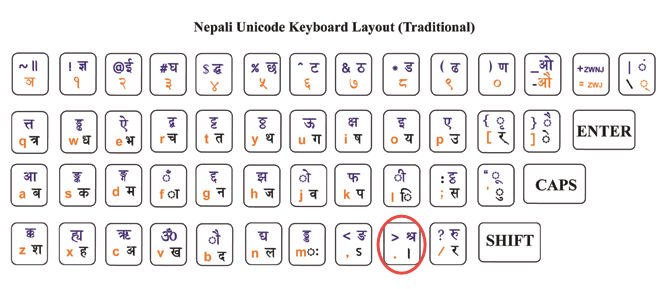
Choose traditional if you are familiar with BA, KA, MA, NA nepali typing like in preeti, kantipur. If you need the keyboard layouts for these true type fonts you can download here. I have included the keyboad layouts for preeti font, kantipur font and fontasy_himali_ tt font. If you need the keyboard layouts for other fonts than mentioned you can request me at my feedback. I will include them in Keyboard Layouts or in your mail. For now lets keep on installing Nepali Unicode, so here goes the traditional layout screenshot
Steps
- Unzip the romanized or traditional version
- You have to logon with administrative rights
- Double click on nepali.msi or tradi.msi to install nepali unicode on the system
- With the Windows XP installation CD in the CD Drive Go to the control panel
- Click on the regional and language options if in the classic view

- If in the Category view, click on Date, Time, Language, and Regional Options >> Regional and Language Options >>

- Click on
Languages Tab
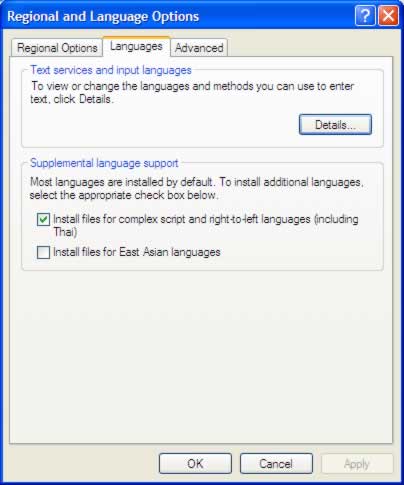
- Put a check mark in Install files for complex script and right-to-left languages (including Thai)
- Click on Apply
- Restart the computer or without restarting click on the Details command button
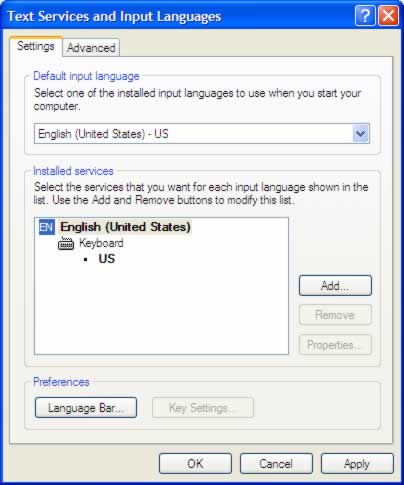
- Click on Add command button
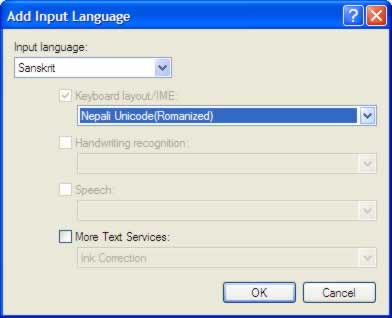
- Select Sanskrit in Input Language and Nepali Unicode (romanized or traditional) in the Keyboard layout
- Click on OK command button
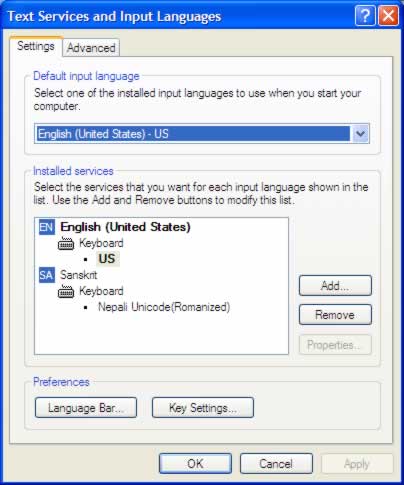
- Click on Apply or OK command button.
- Restart the computer if you haven't.
- Use Alt+Shift to switch between the nepali language and the english language.
